How to fill a Window Box for Christmas
This year I decorated my Window Box For Christmas. Making Christmas window boxes is a great way to bring fresh visual interest to your home during the holiday season, and when the outdoors are looking dead and gloomy! It has brought me so much joy and was a lot of fun to make. You can create beautiful window boxes with a mix of greenery, flowers, and seasonal decorations. These can be bought or foraged for. We get a permit and can cut down our own Christmas tree, while we were out I got a few more branches for my window boxes. I also gathered some pinecones. Making these decorations 100% free! You can also use old Christmas ornaments. Here’s a step-by-step guide to DIY your own Christmas window boxes this year.
Materials Needed for Christmas Window Box
- Window box container (wooden, plastic, or metal)
- Floral foam chicken wire or potting soil (to secure greenery or for live plants)
- Battery-operated lights (optional, for a cozy glow)
- Ribbon or burlap (to add texture)
- Decorative items like pine cones, fake snow, small ornaments, ribbon, fake flowers, or berries
- Floral wire or zip ties (to secure the decorative items)
- Pruners or scissors
1. Prepare the Window Box Container
- If you’re using a container that will be exposed to the elements, ensure it’s sturdy and has drainage holes if planting live plants
- Fill the window box to hold the decorations in with chicken wire, potting soil, or floral form that has soaked in water. Just remember that this will be outside so plan according to your weather and climate.
2. Fill with Floral Foam or Wire or Soil
- If you are using floral foam, cut it to fit the window box. Soak the foam in water if using live greenery.
- Alternatively, you can use chicken wire, which allows you to create a more structured design and hold your greenery in place.
- I just kept the dirt in the boxes and stuck the branches in the dirt, but if you are getting new boxes for this project you will want to fill it with something to hold the branches up.
3. Start with the Greenery
- Cut your greenery into manageable pieces (about 6-8 inches long). Start with the largest branches and place them at the back of the window box to create depth.
- Place evergreen branches like pine or fir at the back, angled slightly outwards, and then layer smaller branches towards the front.
- For a full, lush look, layer in different types of greenery, such as cedar or holly.
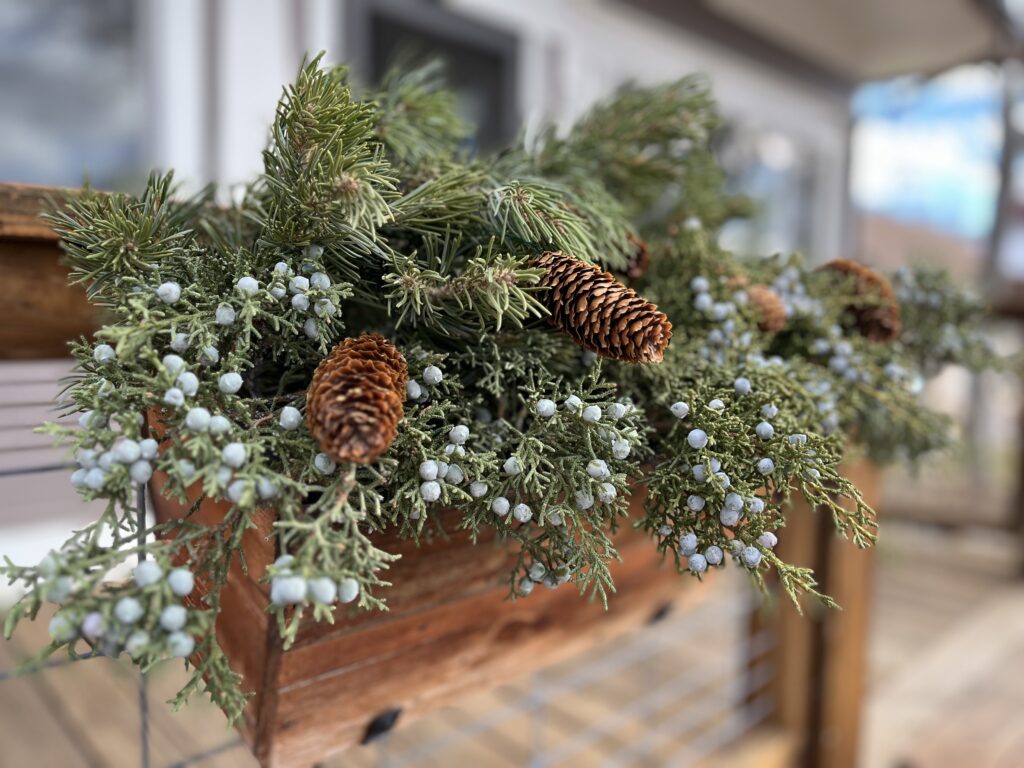
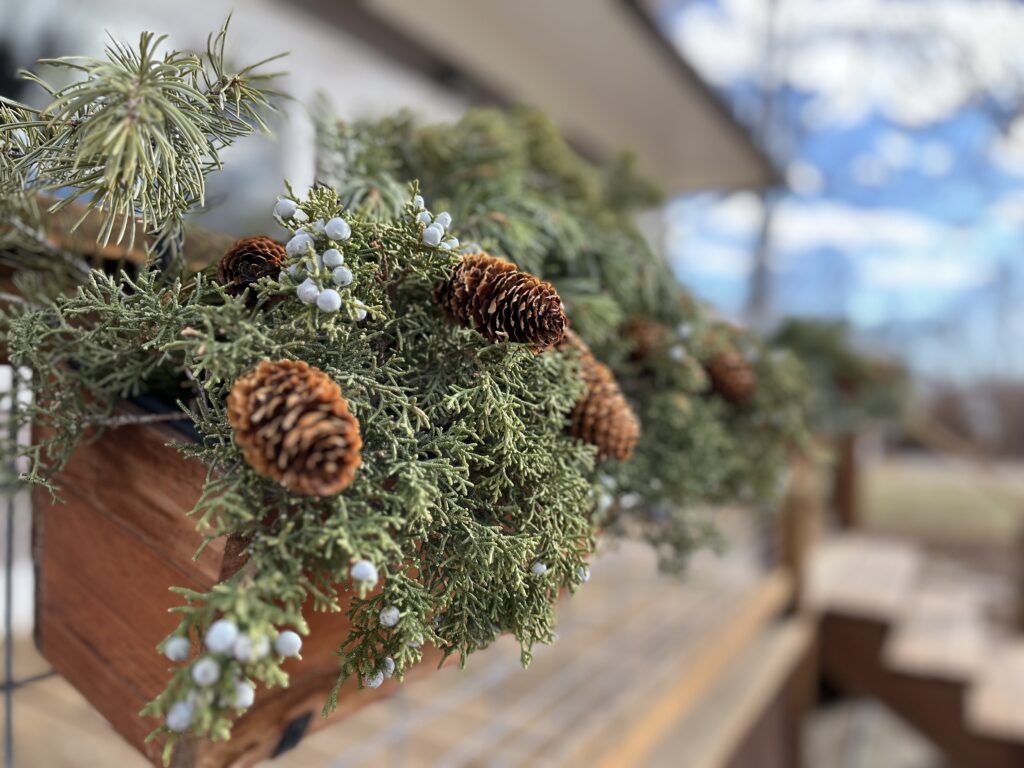
- I used Spruce and Juniper branches

4. Add Focal Points
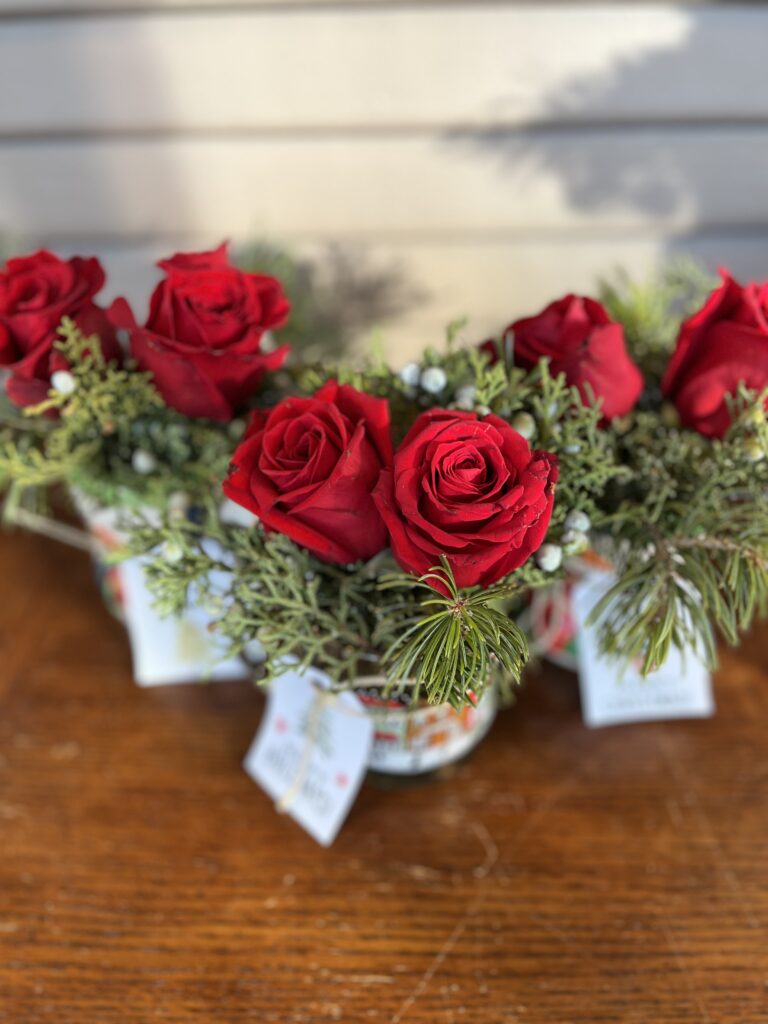
- Add larger decorative elements, such as a few sprigs of holly, ornaments, red berries, pine cones or any other festive ornaments.
- I like to put an odd number of focal point to make it look balanced and a pop of color.
5. Add Decorative Items
- Tuck in smaller decorations like pinecones, cinnamon sticks, fake snow, or Christmas-themed figurines. Use floral wire or zip ties to secure them if necessary.
- Add ribbons or burlap stands around the edges of the window box for extra texture and color contrast.
6. Finishing Touches
- If you’re using live plants, water the box periodically to ensure the greenery stays fresh.
- You can also lightly dust the greenery with artificial snow spray for a wintery effect.
- You can also tuck in battery-operated string lights to add warmth and sparkle to the arrangement. Drape the lights carefully through the greenery.
Final Christmas window box ideas and tips
- Use a mix of textures to create a more dynamic and visually interesting window box. Different greens, flowers, and other decorations will make your design more eye-catching.
- Consider the climate: If you live in a cold climate, be sure to choose hardy evergreen varieties that can withstand the weather.
- Consider your color scheme: Traditional red and green are classic Christmas colors, but white, gold, silver, or even blue juniper berries can create a more modern or winter-wonderland themed look.
- Incorporate natural elements: Pinecones, dried orange slices, cinnamon sticks, and red berries can all add a rustic charm to your window box.
- The power of three: I found you need at least three different elements for the window boxes to look full. With only one or two it just looks unfinished.
Once you finish, place your Christmas window box securely under the window. There you have it! A beautiful window box. It is so fun to have some outdoor projects when the gardening is so slow. And look how beautiful it looks in the snow!

Shop This Post
Links Coming Soon!
I hope your window boxes bring you as much joy as mine have to me this winter.
As always,
Grow flowers to heal your soul,
Beth